How to setup a Real Time Clock on a Raspberry Pi B v1.1
If you didn’t know, the Raspberry Pi doesn’t hold the time very well, this is because there is no on board Real Time Clock.

To keep the devices time accurate we need to add a module that holds the time whenever the RPi has no power running to it and then updates the RPi with the time saved on the battery powered module when the full power is restored and the system starts running again.
DS3231 vs DS1307
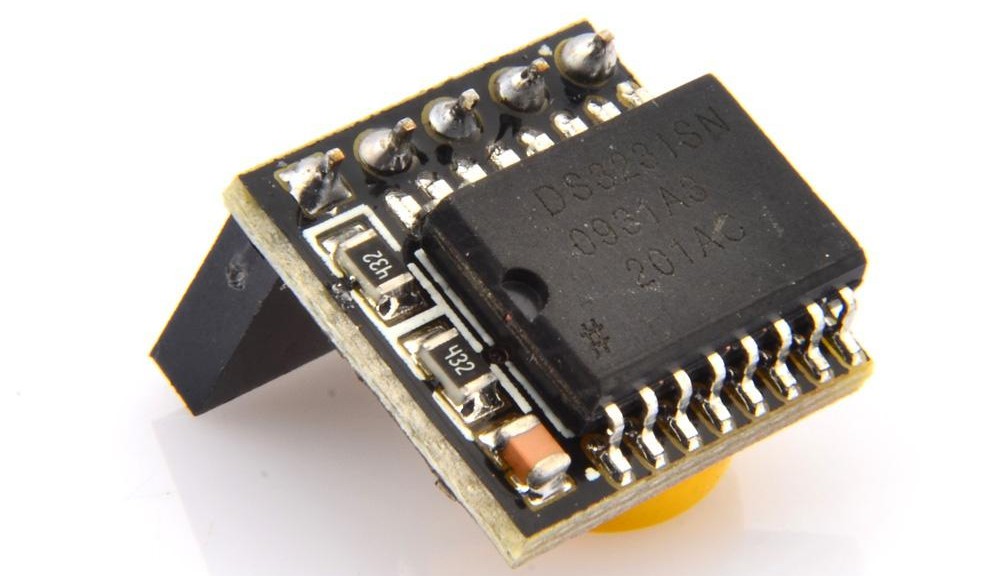
The Dallas DS3231 I2C RTC chip is allot more accurate than the commonly used DS1307 chip. It also comes on a pre made PCB with a battery and female header to attach to the Pi’s GPIO header

The Hardware
Please be aware, the below code and options have been used to run on a Raspberry Pi B V1.1. Some of the commands/Syntax maybe incorrect for other Raspberry Pi models.
For the build I purchased some DS3231 RTC chips prebuilt on mini PCB’s from Ebay

Raspberry Pi Prerequisites:
As always, ensure you have the latest OS by running the below update commands before installing new hardware:
sudo apt-get update
sudo apt-get -y upgrade
Enable the I2C interface on the Rpi:
sudo raspi-config

- Select “8 Advanced Options”
- Select “A7 I2C”
- Select “Yes”

The RPi will confirm the request:
- Select “OK”

Load the I2C kernel module as default:
- Select “Yes”

The RPi will confirm the request:
- Select “OK”

The RPi will take you back to the main menu:
- Select “Finish”

Install I2C Utilities and Python Interface and update Modules file
To help debugging and allow the i2c interface to be used within Python we can install “python-smbus” and “i2c-tools” :
sudo apt-get update
sudo apt-get install -y python-smbus i2c-tools
Enter the following command to edit the Module file:
sudo nano /etc/modules
Ensure ‘i2c-dev’ appears within the file
# /etc/modules: kernel modules to load at boot time.
#
# This file contains the names of kernel modules that should be loaded
# at boot time, one per line. Lines beginning with "#" are ignored.
# Parameters can be specified after the module name.

snd-bcm2835
i2c-dev
Once installed, reboot the RPi:
sudo reboot
Connecting the PCB to the Raspberry Pi
The DS3231 module is an I2C device that is attached to IO pins 1-3-5-7 on the Raspberry Pi B+

Testing the connection and software
Once you have run through the prerequisites and connected the DS3231 to the Pins 1-3-5-7 run the following command to confirm the device is now connected:
lsmod | grep i2c_
the output will list connected I2C devices , the DS3231 will show as a ‘i2c_bcm2708″, should be something like:
pi@rpi2 ~ $ lsmod | grep i2c_
i2c_bcm2708 5014 0
Another way to test that everything up to now is working, once the final reboot has taken place, enter the command:
sudo i2cdetect -y 1
The output shout be something like the below:
pi@rpi2 ~ $ sudo i2cdetect -y 1
     0  1  2  3  4  5  6  7  8  9  a  b  c  d  e  f
00:          -- -- -- -- -- -- -- -- -- -- -- -- --
10: -- -- -- -- -- -- -- -- -- -- -- -- -- -- -- --
20: -- -- -- -- -- -- -- -- -- -- -- -- -- -- -- --
30: -- -- -- -- -- -- -- -- -- -- -- -- -- -- -- --
40: -- -- -- -- -- -- -- -- -- -- -- -- -- -- -- --
50: -- -- -- -- -- -- -- -- -- -- -- -- -- -- -- --
60: -- -- -- -- -- -- -- -- 68 -- -- -- -- -- -- --
70: -- -- -- -- -- -- -- --
Configuring the RPi to get time from the DS3231
So, with the hardware connected, prerequisites carried out and its the test shows a device connected we can do set the RPi to take the time from thee DS3231 hardware clock on boot.
To do this we edit the rc.local file:
sudo nano /etc/rc.local
Add the following two lines before the exit 0 line :
echo ds1307 0x68 > /sys/class/i2c-adapter/i2c-1/new_device
hwclock -s
The outcome should be like this:
pi@rpi2 ~ $ sudo nano /etc/rc.local
  GNU nano 2.2.6             File: /etc/rc.local                      Modified

#
# By default this script does nothing.

# Print the IP address
_IP=$(hostname -I) || true
if [ "$_IP" ]; then
  printf "My IP address is %s\n" "$_IP"
fi

echo ds1307 0x68 > /sys/class/i2c-adapter/i2c-1/new_device
hwclock -s

exit 0
To exit and save the document use the key combination:
- CTRL X
- Y for Yes
- Enter
Reboot the RPi:
sudo reboot
If you were to re run the i2cdetect -y 1 command again you would get the following output, this is expected:
pi@rpi2 ~ $ sudo i2cdetect -y 1
     0  1  2  3  4  5  6  7  8  9  a  b  c  d  e  f
00:          -- -- -- -- -- -- -- -- -- -- -- -- --
10: -- -- -- -- -- -- -- -- -- -- -- -- -- -- -- --
20: -- -- -- -- -- -- -- -- -- -- -- -- -- -- -- --
30: -- -- -- -- -- -- -- -- -- -- -- -- -- -- -- --
40: -- -- -- -- -- -- -- -- -- -- -- -- -- -- -- --
50: -- -- -- -- -- -- -- -- -- -- -- -- -- -- -- --
60: -- -- -- -- -- -- -- -- UU -- -- -- -- -- -- --
70: -- -- -- -- -- -- -- --
Time Zones and Daylight Saving Time
To check or update your time preferences follow the below commands:
Load the Rasp-Config:
sudo raspi-config
- Select “4 Internationalisation Options ”
- Select “Change Timezone”
- Select “Yes”
- Run through the wizard and select your own preferences
- Select Finish from the main config menu when done
Reading The Date And Time
To read the currently set time and date from the RPi use the following command:
date
The output will be like below:
pi@rpi2 ~ $ date
Sat Jan  2 17:57:25 GMT 2016
To set this to anything other, user the following commands:
sudo date -s "2 Jan 2016 18:10:00"
To commit this newly set time to the new RTC hardware clock use the following command:
sudo hwclock -w
To read the newly set hardware clock time and make sure its the same as the internal clock use the following commands to show both times at once:
date; sudo hwclock -r
The output will be as below (internal clock on the top and RTC on the bottom)
pi@rpi2 ~ $ date; sudo hwclock -r
Sat Jan  2 18:14:02 GMT 2016
Sat 02 Jan 2016 18:14:02 GMT  -0.126111 seconds
The Final Test
The only real way to test if the whole time keeping thing has worked is to unplug the RPi from the power and network, then plug the RPi upto a keyboard, monitor and power to log in locally and see what the time says, all being well the time will be accurate as expected.